Manual Deployment
How to deploy the scala-adapters Project to a local server.
Everything is standard Play, so please check Play if you have troubles.
For Development
All is needed, is to open the sbt console and run it.
sbt
...
>run -Dconfig.file=server/conf/demo.conf
If you have special configurations for your development environment you can add it,
with -Dconfig.file=server/conf/demo.conf.
This will incrementally compile the code if you made changes.
For Production
Create Package
sbt distwill create a ZIPPROJECT_DIR/server/target/universal/PROJECT_NAME-server-VERSION.zip- Extract this ZIP on your server.
Deployed Projects
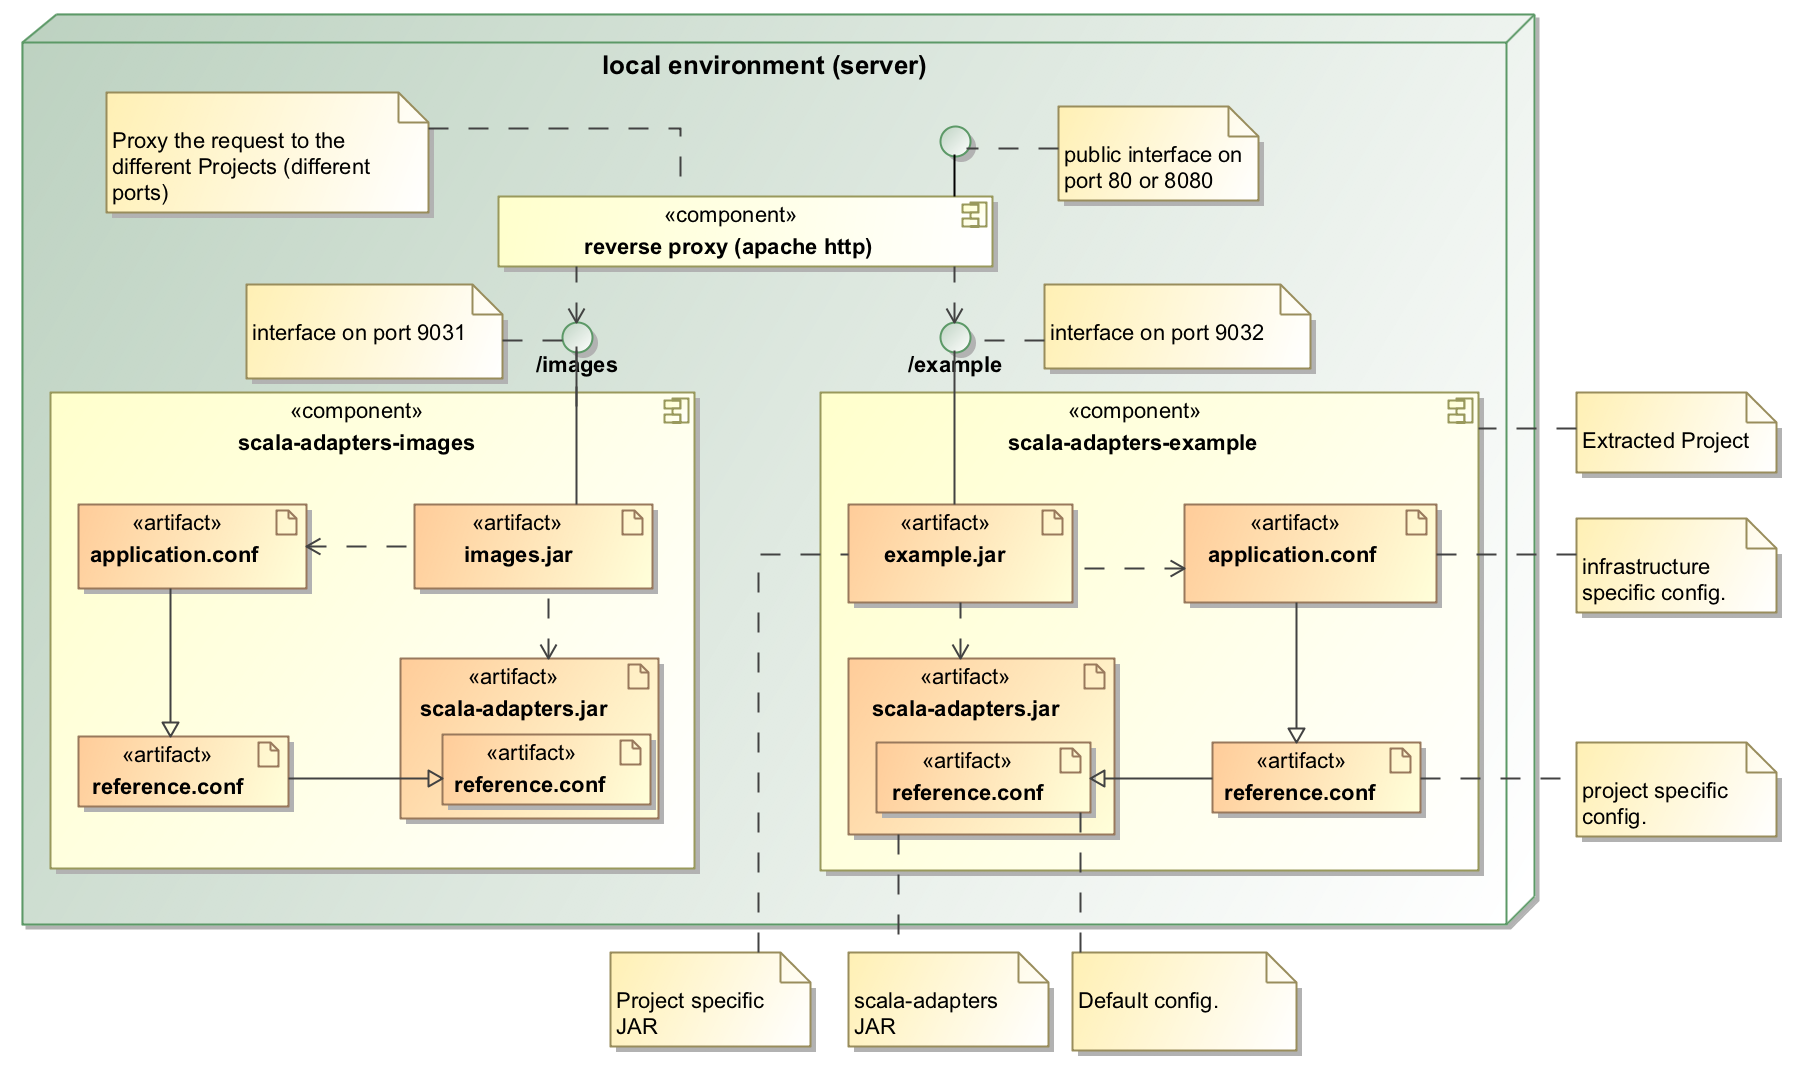
The following diagram displays how a deployment of 2 projects looks like.

As each Project runs as its own process on its own port, a Reverse Proxy is needed in the setup.
Run it
In the extracted file structure (./bin), you find 2 starting scripts:
PROJECT_NAME-serverfor Linux Environment.PROJECT_NAME-server.batfor Windows Environment.
These start scripts were created by sbt dist command (Play plugin).
Environment variables
You can adjust the environment variables in ./conf/application.ini which will be taken by the script.
For windows - some changes are needed!
We added for that a ./conf/windows-install.bat in scala-adapters-g8 to do these changes. Be aware this is not yet tested und you need to adjust it a bit!
Heroku
If you have an Heroku account, you can create Procfile in the projects root directory:
web: server/target/universal/stage/bin/PROJECT_NAME-server -Dhttp.port=${PORT}
After git push you run git push heroku master to publish the changes to Heroku.
With heroku open you will see the result in the browser.